 Pin it
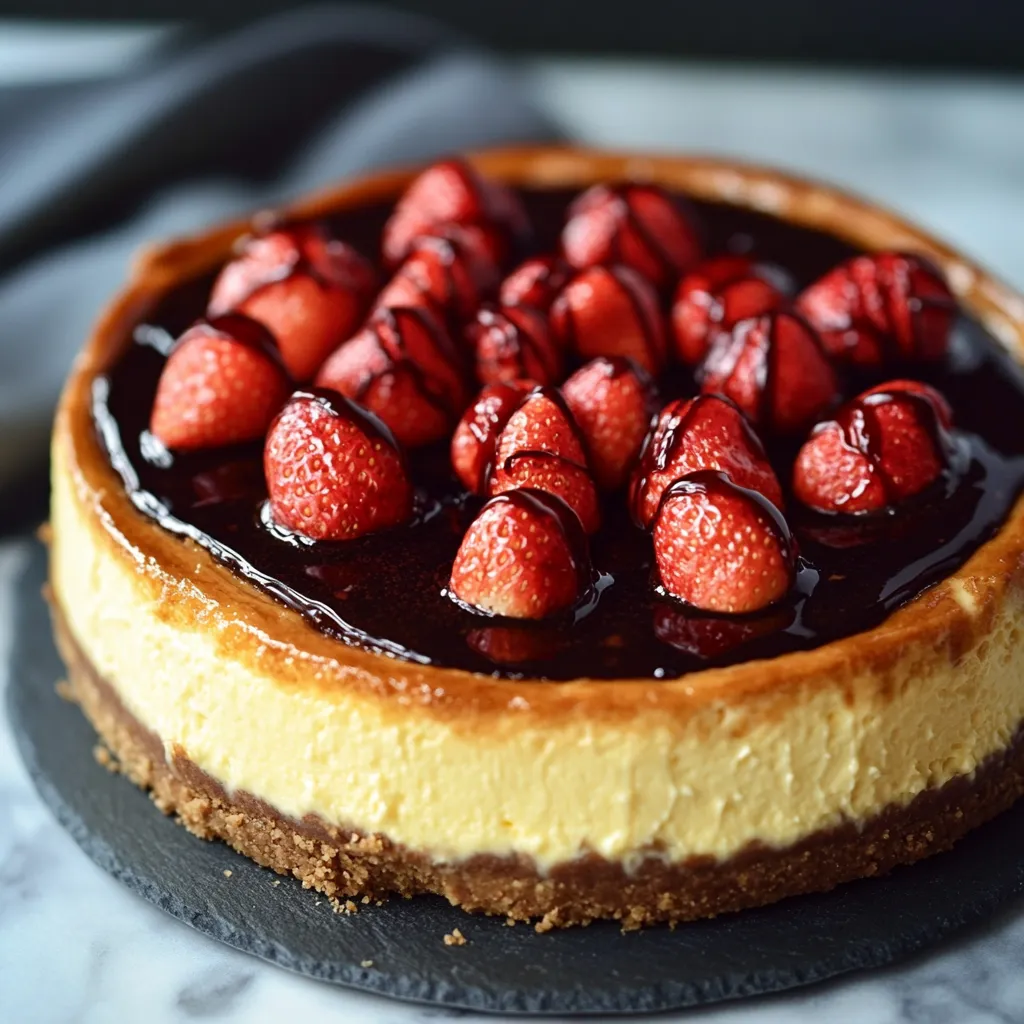
This indulgent vanilla bean cheesecake topped with chocolate covered strawberries transforms any occasion into a celebration. The delicate balance of creamy cheesecake, fresh strawberries, and rich chocolate creates a dessert that looks as impressive as it tastes.
I first made this for my husband's birthday, and it's now our tradition for every special occasion. The combination of vanilla bean and chocolate covered strawberries never fails to impress our guests who always leave with the recipe.
Ingredients
- Cream cheese: four 8oz packages room temperature for the smoothest texture and to prevent lumps
- Sugar: creates the perfect sweetness while maintaining the tangy cream cheese flavor
- Cornstarch: prevents cracks and creates that signature velvety texture
- Vanilla bean paste: provides those beautiful flecks and intense flavor that extract cannot match
- Eggs: provide structure and richness to the filling
- Sour cream: adds tanginess and creates a lighter texture
- Heavy cream: adds richness and helps achieve that silky mouthfeel
- Graham cracker crust: provides the perfect crunchy contrast to the creamy filling
- Strawberries: fresh and ripe for the most striking presentation
- Chocolate: high quality melting chocolate works best for the topping
Step-by-Step Instructions
- Prepare the cream cheese:
- Beat room temperature cream cheese until completely smooth with no lumps whatsoever. This is crucial for a silky cheesecake. If your cream cheese has any cold spots, you'll end up with little lumps that never fully incorporate.
- Incorporate the dry ingredients:
- Add sugar and cornstarch, mixing on low speed for a full two minutes. This incorporates air into the batter while ensuring the cornstarch is fully distributed. The cornstarch acts as a stabilizer and helps prevent cracks.
- Add the vanilla bean:
- Scrape the tiny seeds from inside the vanilla bean and add to the mixture. These little flecks will distribute throughout the batter, creating beautiful visual appeal and intense vanilla flavor in every bite.
- Add eggs and dairy:
- Mix in eggs one at a time, allowing each to fully incorporate before adding the next. Then gently blend in the heavy cream and sour cream just until combined. Overmixing at this stage can incorporate too much air, leading to cracks during baking.
- Prepare the water bath:
- Cover the outside bottom of your springform pan with aluminum foil to create a watertight seal. Place the filled pan inside a larger baking dish. Once in the oven, carefully add boiling water to the outer pan, creating a humid environment that ensures gentle, even baking.
- Bake to perfection:
- Bake for 50 to 60 minutes at 350°F. The cheesecake is done when the edges are set but the center still has a slight jiggle. This slight wobble will set as it cools, resulting in the perfect creamy texture.
- Cool properly:
- Allow the cheesecake to cool gradually at room temperature for about an hour before refrigerating overnight. This prevents the dramatic temperature change that can cause cracks.
- Add the finishing touches:
- Top the chilled cheesecake with fresh strawberries and drizzle with melted chocolate just before serving for the most dramatic presentation.
 Pin it
Vanilla beans have always fascinated me with their intense aroma and flavor. The first time I split open a vanilla bean pod and saw those tiny seeds, I was amazed at how something so small could pack such incredible flavor. Now I keep them on hand specifically for special desserts like this cheesecake where the vanilla truly shines.
Perfect Slicing Technique
For picture perfect slices, warm your knife under hot water and wipe clean between each cut. The heat helps the knife glide through the dense cheesecake without dragging or creating messy edges. I recommend slicing before adding the strawberries and chocolate for the cleanest results, then adding the toppings to each individual slice for an elegant presentation.
Storage and Make Ahead Tips
This cheesecake actually improves with time as the flavors deepen. You can prepare the cheesecake portion up to three days ahead and store covered in the refrigerator. Add the strawberries and chocolate drizzle just before serving for the freshest presentation. If you need to store leftovers, place them in an airtight container in the refrigerator for up to five days. The cheesecake also freezes beautifully without the toppings for up to three months.
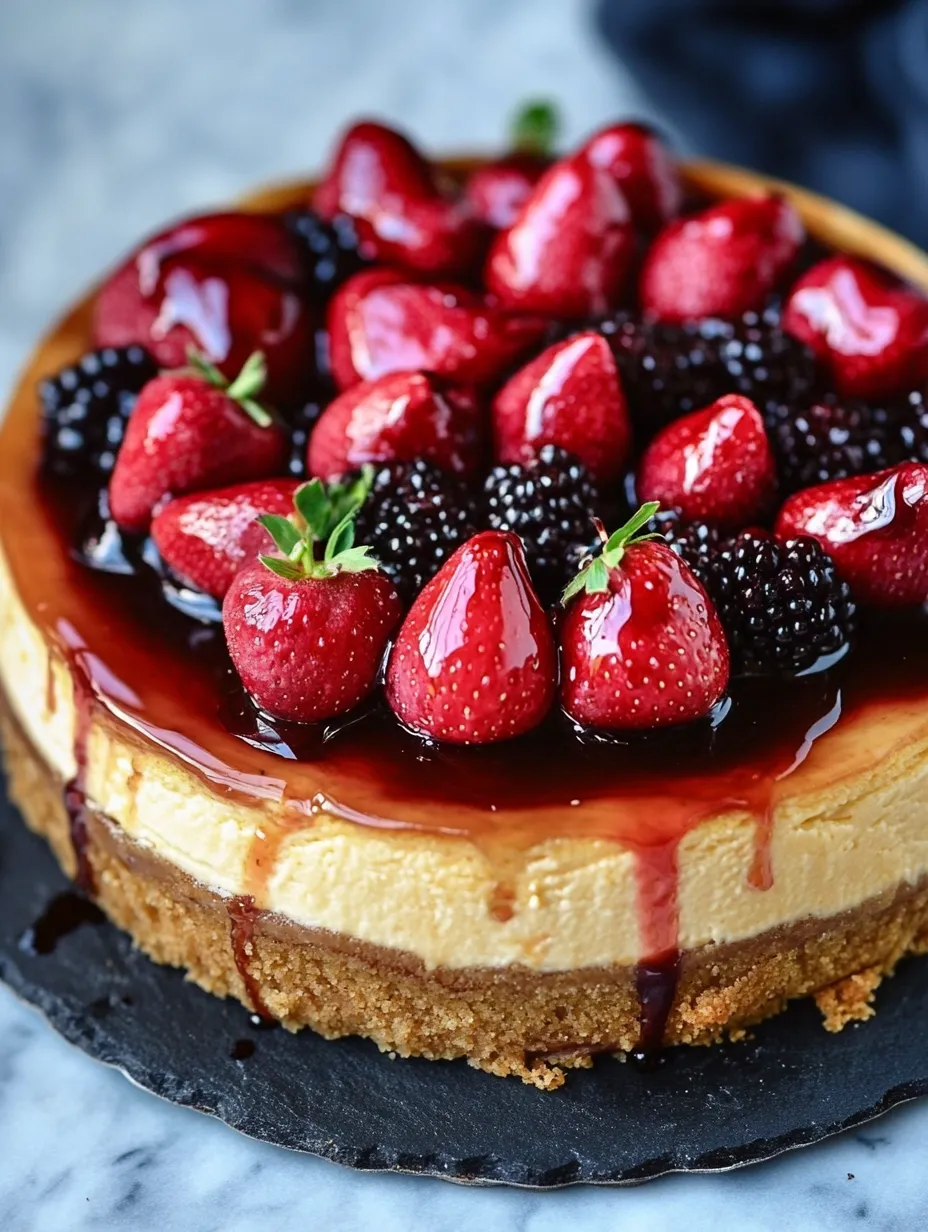
Seasonal Variations
While strawberries create a classic presentation, this versatile cheesecake base works beautifully with other seasonal fruits. Try fresh raspberries in summer, poached pears in fall, or pomegranate arils during winter celebrations. The vanilla bean cheesecake provides a perfect canvas for whatever fruits are at their peak. My family particularly loves it with a mixture of summer berries when we can get them fresh from the farmers market.
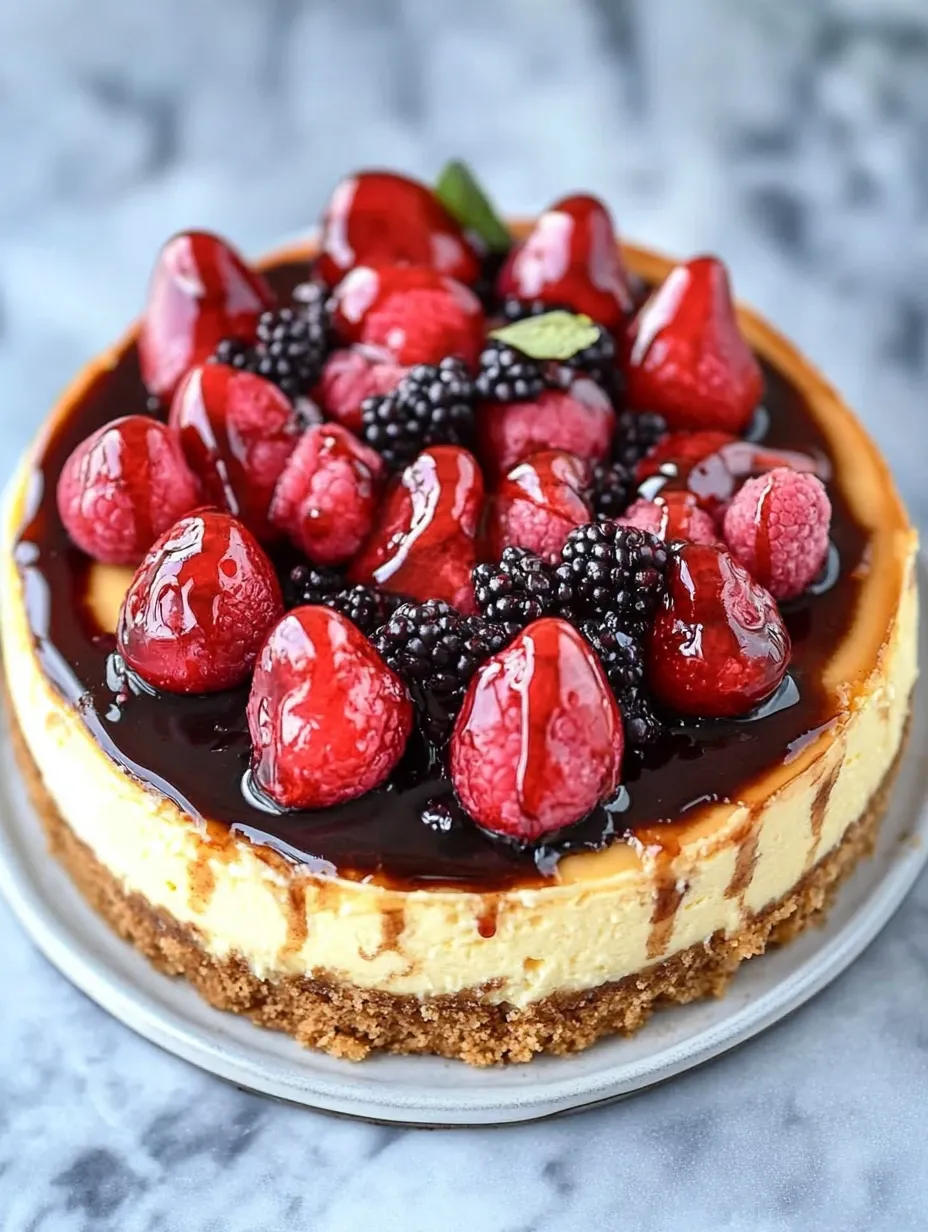
Serving Suggestions
Present this showstopper on a cake stand garnished with additional fresh strawberries around the base. For an extra special touch, serve with a small pitcher of warm chocolate sauce on the side that guests can add to their preference. A glass of champagne or dessert wine makes the perfect accompaniment for celebrations, while coffee balances the sweetness beautifully for everyday indulgence.
 Pin it
Frequently Asked Questions
- → How do I get a smooth cheesecake texture?
Ensure all ingredients are at room temperature and avoid overmixing the batter to create a smooth texture.
- → What is the best crust for this cheesecake?
A graham cracker crust works wonderfully, but you can also try chocolate or vanilla wafer crusts.
- → How do I bake the cheesecake without cracks?
Bake the cheesecake in a water bath, and avoid overbaking. Let it cool gradually for the best results.
- → Can I use vanilla extract instead of vanilla bean paste?
Yes, substitute 2 teaspoons of vanilla extract for the 1 teaspoon of vanilla bean paste.
- → How should I store chocolate strawberry cheesecake?
Store the cheesecake in the refrigerator, covered tightly, for up to 5 days. Add the chocolate and strawberries just before serving.