 Pin it
I got so fed up with spending big bucks on those fancy KIND bars at the store that I decided to make my own! After some kitchen trials (and a few messy failures), I nailed this version that hits all the right notes with that sweet-salty crunch I was after. Adding dark chocolate on the bottom and drizzling it on top with a bit of flaky salt transforms them from decent to downright irresistible. Now they're what I grab for mountain trips, what goes in my kids' lunch bags, and what saves me during those 3pm energy crashes when I need something filling without too much sweetness.
My husband typically goes for chips when he wants something crunchy, but now he grabs these bars instead! When I shared some with my neighbor, she couldn't believe I'd made them myself—she thought they came from some expensive health store. There's just something about mixing toasted nuts with that sticky-sweet binding and rich dark chocolate that practically everyone loves.
Basic Components
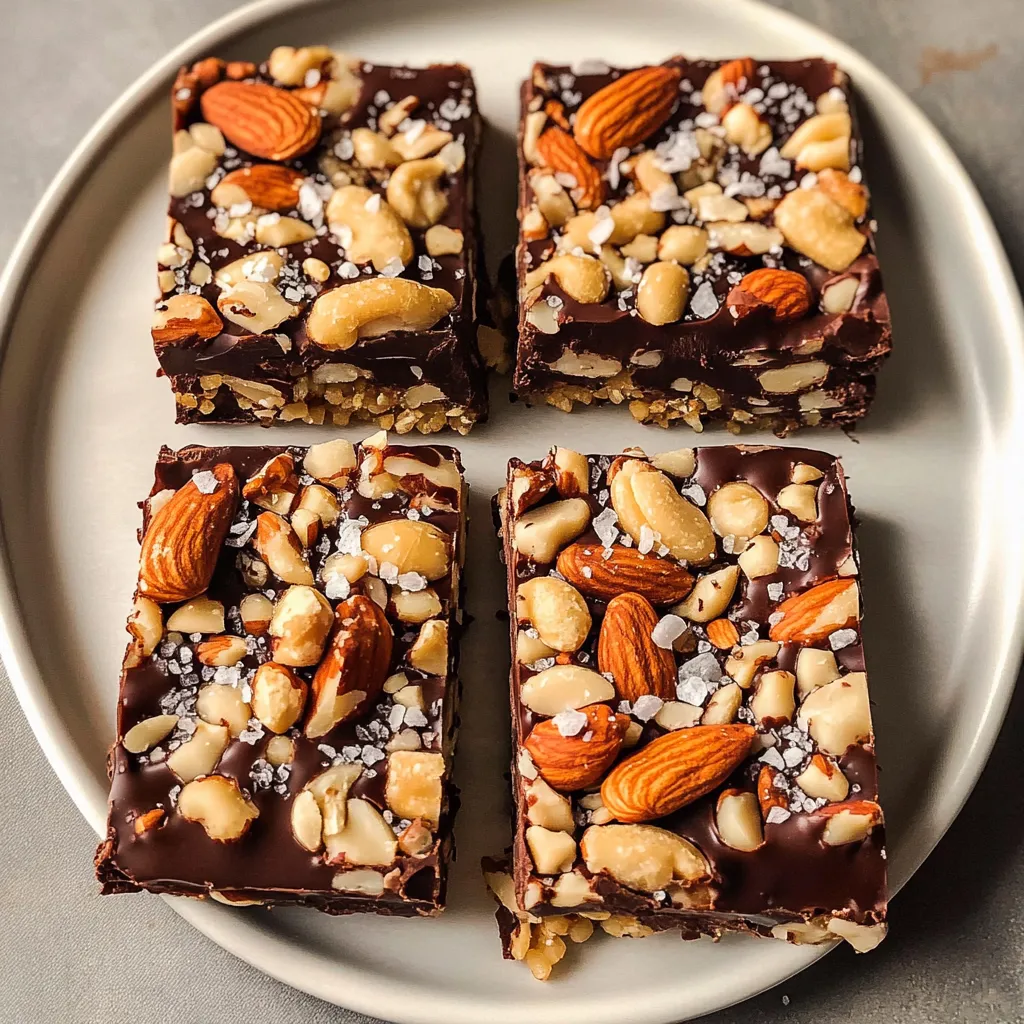
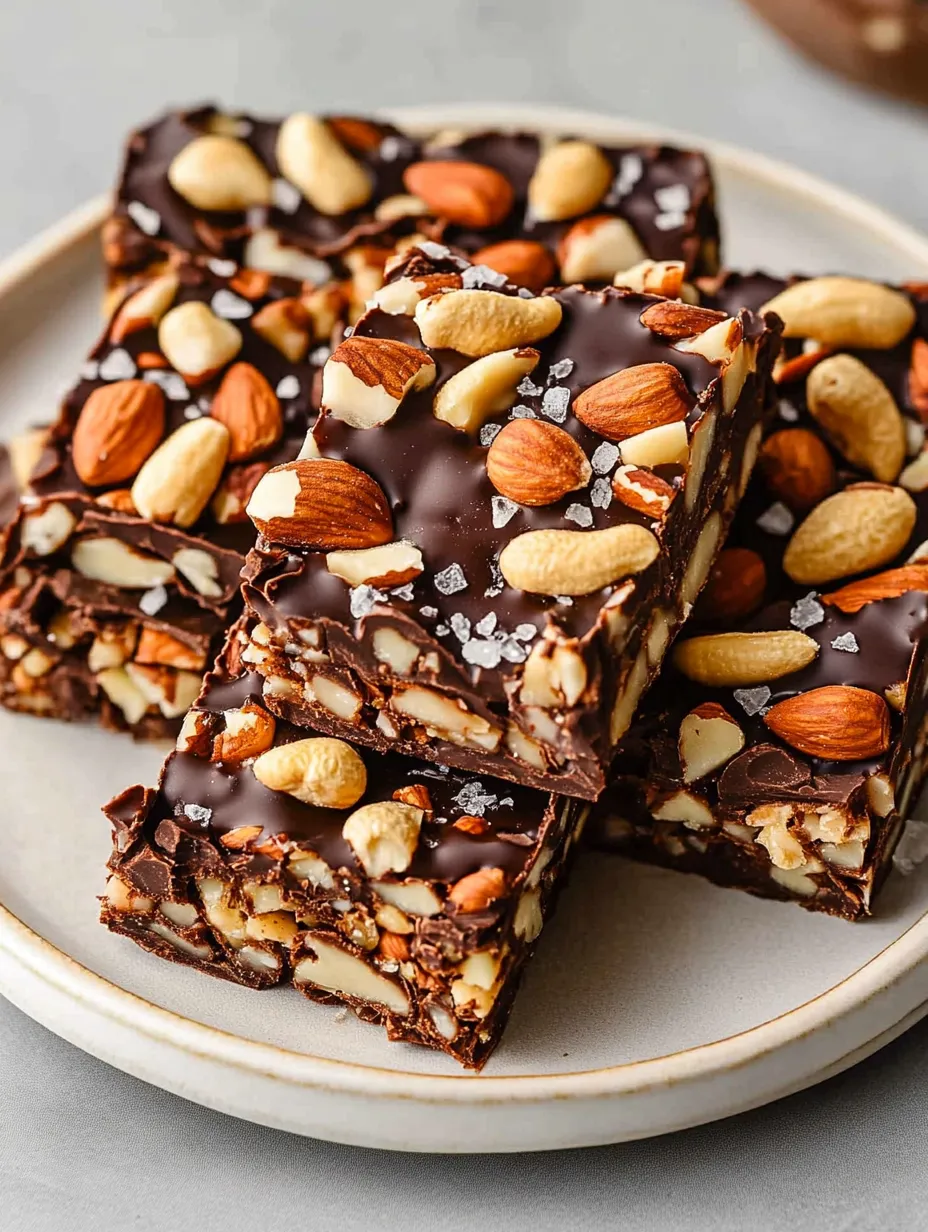
- Mixed nuts: Using different kinds gives you better flavor and crunch. Cashews bring creaminess, peanuts add that classic salty taste, and almonds give you the perfect snap. Don't stress though—whatever nuts you've got will work fine. Hazelnuts and pecans taste amazing in these too!
- Puffed rice: This stops the bars from feeling too heavy. I grab plain unsweetened puffed rice, but I've thrown in puffed quinoa too which adds an interesting nutty flavor.
- Brown rice syrup: This is what makes everything stick together! It's thicker and less sweet than honey, giving these bars that perfect chewy-yet-crunchy feel. I've tried using honey when I ran out, but the bars don't hold shape as well.
- Dark chocolate: Go for the nicest one you can afford. I like around 70% cacao for just the right balance between sweetness and rich chocolate flavor. Those big chocolate chip bags you can get at warehouse stores work perfectly.
- Flaky sea salt: Don't even think about skipping this! That tiny sprinkle on top makes all the difference. I use Maldon, but any flaky salt does the job. Regular salt just won't give you the same effect here.
 Pin it
Foolproof Method
- Nut browning tricks
- Getting that tasty toasted flavor means watching your nuts like a hawk in the oven. The gap between perfectly toasted and burnt is literally just seconds! You want them smelling good and barely starting to color. My first attempt went south when I looked away and burnt the nuts, making the bars taste bitter. Now I set my timer for 5 minutes and start checking on them right then.
- Mixture bonding
- Getting that perfect not-too-hard, not-too-soft texture happens when you handle the brown rice syrup right. Warming it a bit makes it so much easier to work with – it flows and covers everything evenly instead of clumping up. Work fast once you mix it with the nuts, as it starts hardening quickly. I use a silicone spoon with a tiny bit of cooking spray to keep things from sticking while mixing.
- Packing method
- Making bars that stick together means pressing them down hard. Really jam that mixture firmly into your pan – I use a measuring cup bottom with a bit of cooking spray to push it down into a solid, flat layer. The sides tend to be thinner, so I focus extra pressure there. Don't be gentle – pressing firmly is how you get bars that don't fall apart when cut.
- Perfect slicing
- Getting clean cuts is all about timing. Letting the baked bars cool about half an hour works best – they're still slightly warm and flexible, but firm enough to cut without breaking. Cutting them straight from the oven makes a gooey mess, but waiting too long means they might crack instead of slice neatly. A sharp kitchen knife works best, wiped clean between cuts for the prettiest edges.
- Chocolate coating
- Getting that perfect chocolate layer takes a bit of patience. Melting chocolate with a touch of coconut oil makes it smoother and better for dipping and drizzling. I tried melting plain chocolate once, but it was too thick and didn't set with that nice snap. Microwaving works great, but be careful not to overheat – chocolate can turn grainy in seconds! I always play it safe with short bursts, stirring well between each.
- Keeping them fresh
- Maintaining freshness means storing them right. Once the chocolate has completely hardened, I put them in a sealed container with parchment between layers so they don't stick together. They stay good at room temperature for about a week, though they rarely last that long at my house! During hot months, I keep them in the fridge so the chocolate doesn't get soft.
My first try at these bars was pretty sad – I didn't toast the nuts enough or press the mixture down firmly, so they fell apart as soon as I picked them up. I've slowly improved the recipe over about six batches to nail that perfect texture and taste balance. I've played with different nut mixes too – my fall favorite uses pecans, almonds and pumpkin seeds with a sprinkle of cinnamon mixed in. For something more tropical, I sometimes add unsweetened coconut and use cashews, macadamias, and almonds.
Enjoyment Ideas
These tasty bars deserve to be savored! I love having one with my afternoon coffee as a small treat just for me. They're great for outdoor trips since they don't melt or break easily in your bag. For school lunches, I wrap each bar in parchment then put them in reusable silicone pouches. They make fantastic pre-workout fuel too – that mix of carbs, protein, and good fats gives you steady energy. When friends come over for coffee, I arrange them on a wooden board with some fresh berries for a simple but fancy-looking snack.
Tasty Twists
These adaptable bars welcome creative changes while keeping that perfect chewy-crunchy balance. For a warming spiced version, add 1 teaspoon cinnamon and a tiny bit of cardamom to your syrup mix. During Christmas, I sometimes toss in dried cranberries and orange zest for a festive touch. My chocolate-crazy husband likes when I mix tiny chocolate chips into the nut mixture (add them after it's cooled a bit so they don't completely melt). And for an extra fancy treat, try adding white chocolate drizzle on top of the dark for a beautiful contrast.
Smart Storage
These bars stay fresh at room temperature for up to a week when kept in a sealed container. I put parchment paper between layers so they don't stick together. For longer keeping, they freeze really well – wrap each bar tightly in plastic then foil and freeze for up to 3 months. Let them sit at room temperature about half an hour before eating. In summer, I keep them in the fridge so the chocolate stays firm, but they taste better when eaten at room temperature.
 Pin it
I first made these dark chocolate and sea salt nut bars to save money compared to store versions, but they've become way more than that. Making your own snacks from scratch feels really rewarding – you control what goes in them, adjust sweetness to your liking, and create something that's both tasty and good for you. They do take some time, but most of that is just waiting for things to cool, and the results are totally worth it. Hearing my family's happy sounds when they bite into these crunchy, salty-sweet treats makes me want to keep making them again and again!
Frequently Asked Questions
- → What can I use instead of brown rice syrup?
- Brown rice syrup keeps the bars sticky and firm, but honey works too. It might make the bars slightly softer. Avoid maple syrup—it’s too runny.
- → Can I switch out the nuts?
- Swap in any nuts you like! Options like pecans, hazelnuts, macadamias, walnuts, or Brazil nuts work great. Stick to a total of 2 1/2 cups.
- → Why are the bars crumbling apart?
- They might not be pressed down tightly enough, baked fully, or cooled well before cutting. Press hard into the pan and let them cool before slicing.
- → Is it possible to make these vegan?
- Sure! Just ensure the dark chocolate chips are vegan. Most already are, but double-check the packaging.
- → How long do these stay fresh?
- In a sealed container in the fridge, they’re good for up to 2 weeks. Or freeze for up to 3 months!