 Pin it
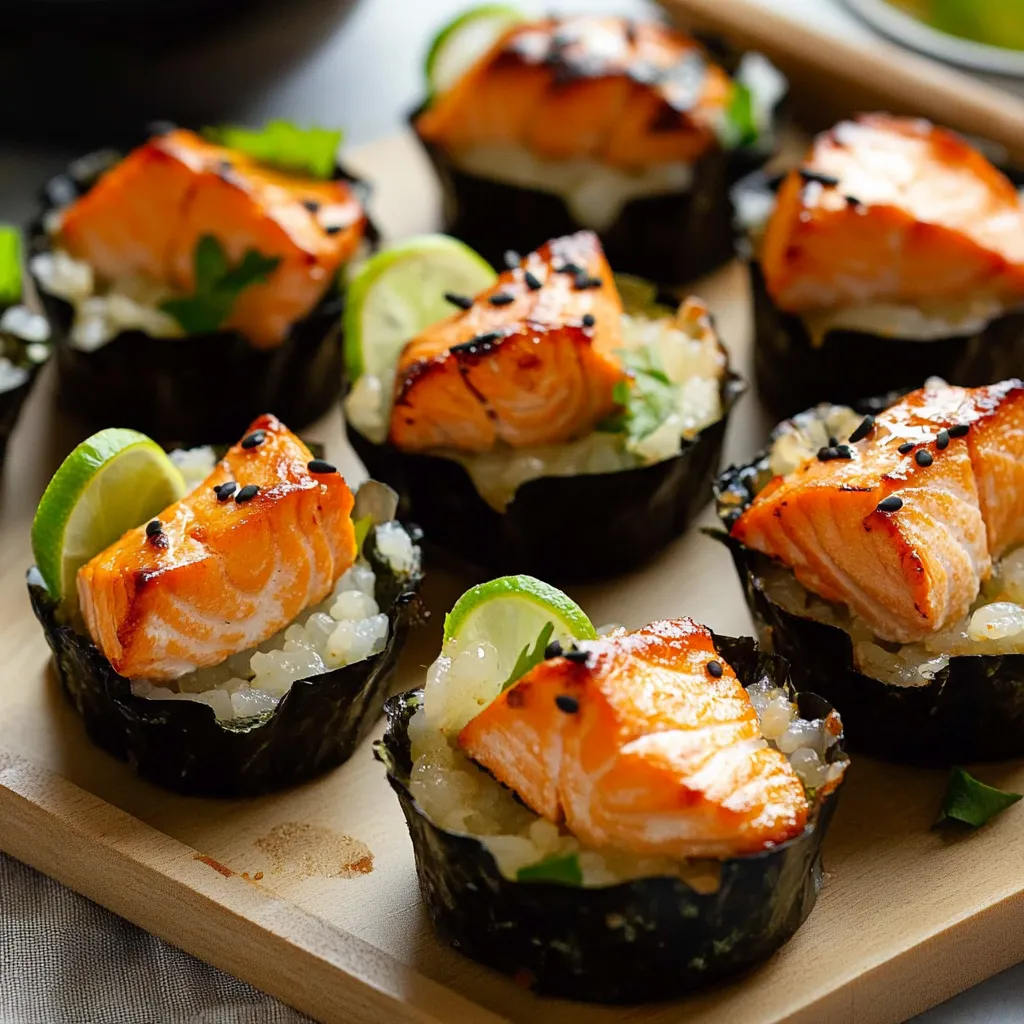
This viral Baked Salmon Sushi Cups recipe transforms traditional sushi into convenient, bite-sized portions that combine the rich flavors of salmon, creamy Kewpie mayo, and sriracha heat. I discovered this TikTok sensation during a dinner party brainstorm and it quickly became my signature appetizer for gatherings.
I first made these during a last-minute dinner with friends and was amazed at how quickly they disappeared. Now my family requests them weekly as a fun alternative to our standard sushi night.
Ingredients
- Sushi rice: Creates the perfect sticky base for holding all ingredients together
- Rice vinegar: Adds essential tangy flavor that defines authentic sushi
- Mirin: Brings a subtle sweetness that balances the vinegar perfectly
- Sweetener: Choose quality agave or honey for best results
- Roasted nori seaweed: Select sheets without tears for the best cup structure
- Salmon: Fresh skinless salmon yields the best texture and flavor
- Soy sauce: Use low sodium if preferred without sacrificing flavor
- Kewpie mayo: The Japanese mayo contains egg yolks for extra richness
- Sriracha: Adjust amount based on your heat preference
Step-by-Step Instructions
- Preparing the Salmon:
- Preheat oven to 400°F and cube skinless salmon into uniform bite-sized pieces about half an inch each. Keeping pieces consistent ensures even cooking throughout all cups.
- Marinating the Salmon:
- Combine salmon cubes with soy sauce, Kewpie mayo, and sriracha in a bowl large enough to mix without crushing the delicate fish. Gently fold ingredients together until salmon is evenly coated but still maintains its texture. Allow to marinate while preparing other components to infuse maximum flavor.
- Flavoring the Sushi Rice:
- Combine warm cooked rice with rice vinegar and mirin in a wide bowl. Use a cutting motion with a wooden spoon rather than stirring to prevent rice from becoming mushy. The warmth helps the rice absorb the flavors properly. If using day-old rice, microwave for 50 seconds first to restore proper texture.
- Assembling the Salmon Sushi Bake Cup:
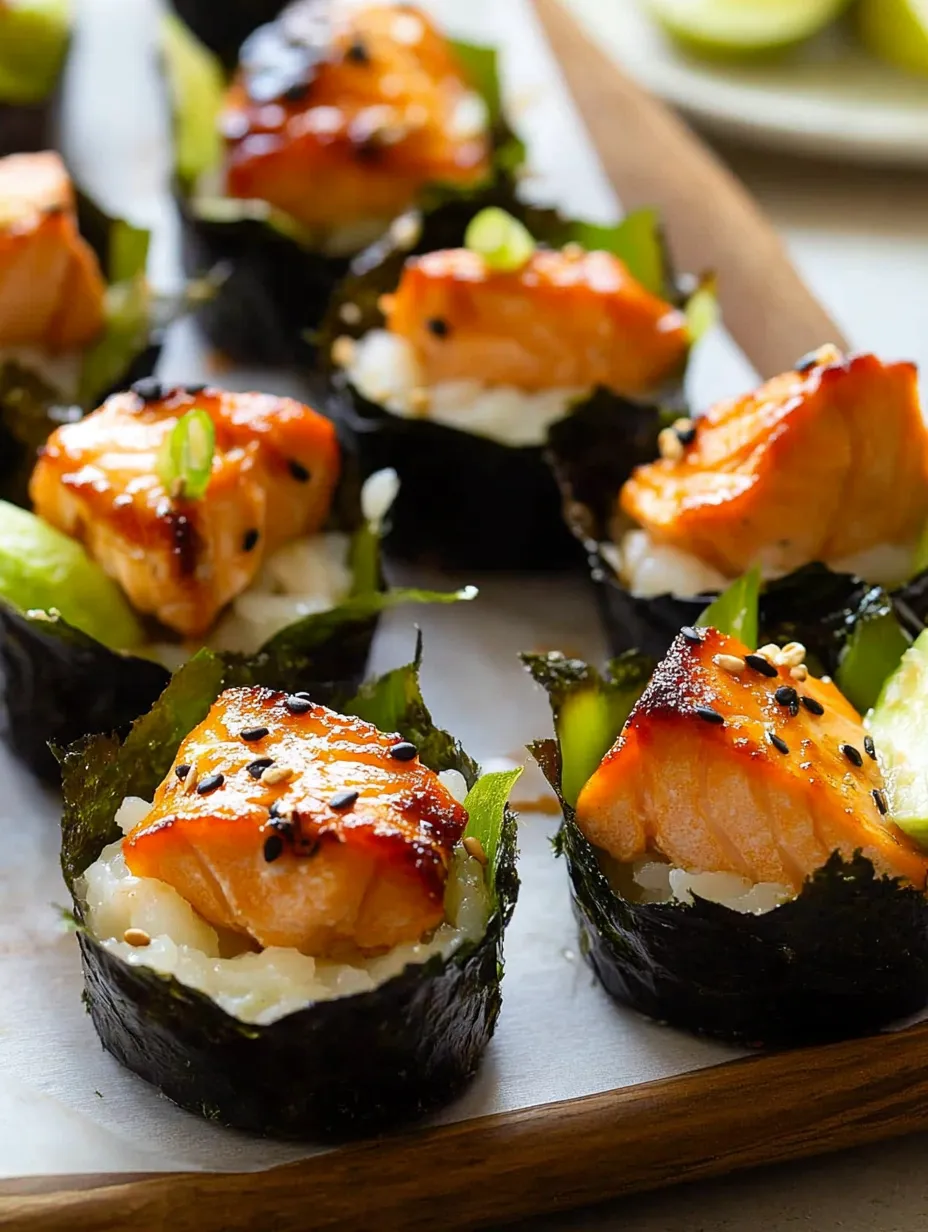
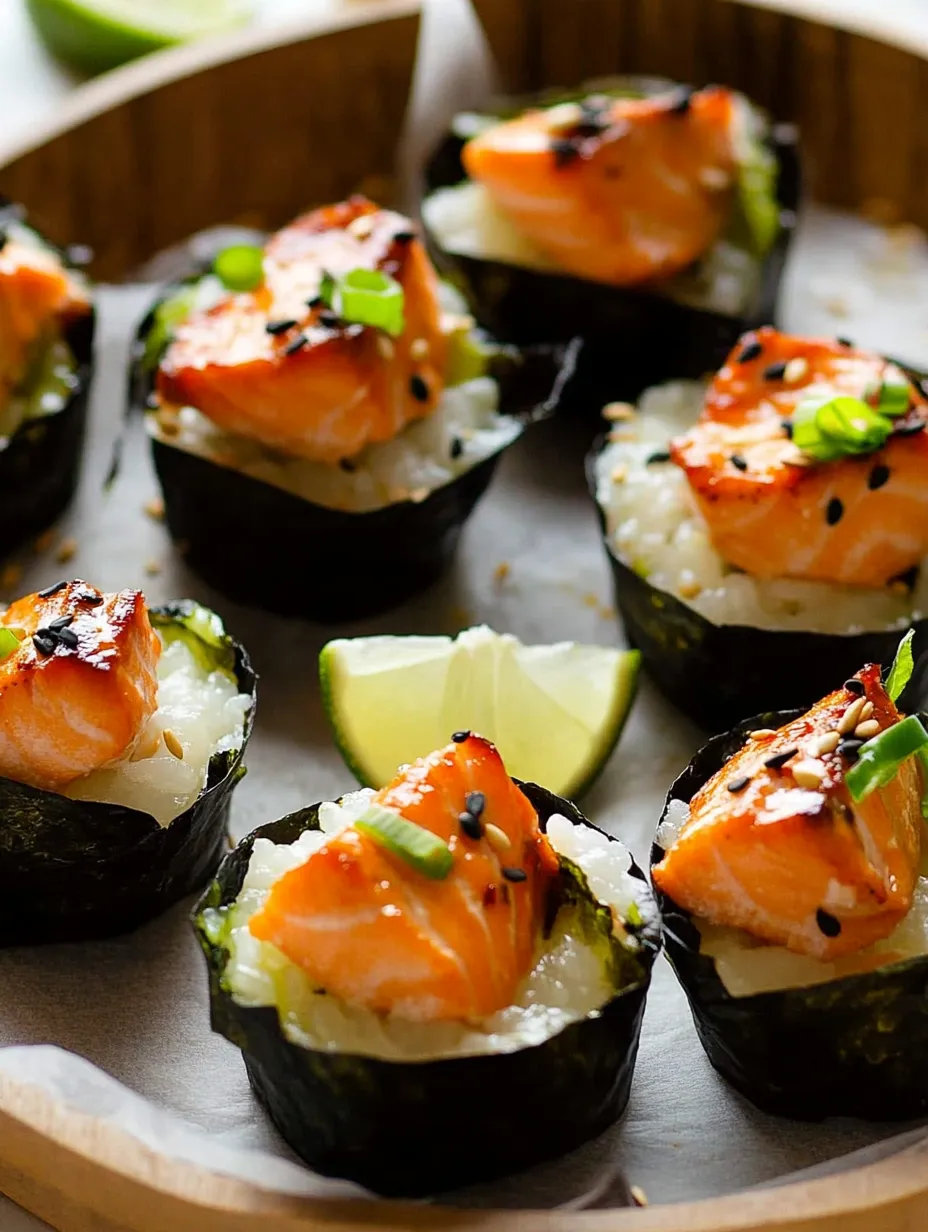
- Line muffin tin cavities with two pieces of nori positioned diagonally to create a star pattern that extends beyond the rim. This technique creates a basket that holds ingredients while providing an attractive presentation. Press approximately two tablespoons of seasoned rice firmly into each nori cup using the back of a measuring spoon to create a solid base. Top each rice portion with an equal amount of marinated salmon mixture.
- Baking and Garnishing:
- Bake assembled cups at 400°F for 12 minutes until salmon is just cooked through but still moist. For a crispy top caramelization, broil for 1-2 minutes while watching carefully to prevent burning. Allow cups to cool for 2-3 minutes before attempting to remove from the tin.
- Serve and Enjoy:
- Garnish each cup with your preferred toppings such as sliced avocado, green onions, additional mayo drizzle, sriracha, and furikake. Serve immediately while still warm for the best flavor experience.
 Pin it
The Kewpie mayo is truly the secret ingredient in this recipe. When I first used it instead of regular mayonnaise, my Japanese neighbor nodded approvingly and said it reminded her of home. That small validation convinced me never to substitute regular mayo in this dish again.
Make-Ahead Options
These sushi cups work beautifully as a make-ahead appetizer. Prepare the rice and salmon mixture up to a day ahead and store separately in the refrigerator. When ready to serve, simply assemble and bake. This strategy has saved me countless times when hosting dinner parties as I can focus on other dishes while these bake.
Substitution Ideas
If salmon isn't available or preferred, try using crab meat, cooked shrimp, or even tofu for a vegetarian option. Each protein brings its own character to the dish while maintaining the overall concept. For gluten-free guests, simply swap regular soy sauce with tamari and ensure your furikake doesn't contain hidden wheat ingredients.
Serving Suggestions
While these cups stand beautifully on their own, I love serving them alongside a simple cucumber salad dressed with rice vinegar and sesame oil. The cool crunch perfectly complements the warm, rich sushi cups. For a complete meal, add miso soup and edamame to create a Japanese-inspired feast that feels restaurant-worthy but requires minimal effort.
Cultural Context
This fusion dish beautifully bridges traditional Japanese sushi flavors with modern convenience. While purists might argue it's not authentic sushi, I see it as a creative evolution that makes Japanese flavors more accessible for home cooks. The recipe respects traditional sushi rice preparation techniques while reimagining the final presentation in a way that's perfect for contemporary entertaining.
 Pin it
Frequently Asked Questions
- → How do I prepare sushi rice for this dish?
Rinse the sushi rice until the water runs clear, then cook according to package instructions. Mix it with rice vinegar and mirin for the signature flavor.
- → Can I substitute the salmon with another protein?
Yes! You can use other proteins like shrimp, tofu, or even chicken for a different flavor while following the same preparation process.
- → What is Kewpie mayo, and can I use a substitute?
Kewpie mayo is a Japanese-style mayonnaise that’s creamier and slightly sweeter. You can use regular mayonnaise with a splash of rice vinegar as a substitute.
- → Can I make these cups ahead of time?
Yes, you can assemble the cups and store them covered in the fridge for up to a day. Bake them just before serving for the best flavor and texture.
- → How can I make this recipe spicier?
Add extra sriracha, chili flakes, or a drizzle of spicy mayo on top of the baked cups for an enhanced spicy kick.
- → Can I prepare this dish without an oven?
Yes, you can use an air fryer to make these cups. Assemble them in ramekins and air fry at 400°F for 12 minutes.